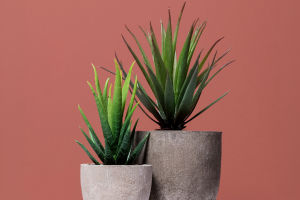
Have you ever noticed that your beloved plants seem to be wilting, even though you're watering them just right?
Or perhaps the leaves are yellowing, and no amount of sunlight or fertilizer seems to help.
If this sounds familiar, your plant might be suffering from root rot, a common but often overlooked plant issue. Root rot is caused by excessive moisture in the soil, typically due to poor drainage or overwatering, and it can quickly destroy a plant if not addressed. Here's how to identify root rot early and take the necessary steps to fix it.
Signs of Root Rot in Plants
Root rot can be sneaky at first, making it difficult to notice until the damage is done. However, there are a few key signs to watch for that can indicate your plant's roots are rotting.
Yellowing Leaves: One of the first signs of root rot is yellowing leaves, especially at the lower part of the plant. As the roots begin to decay, they can no longer supply the plant with the nutrients it needs, causing the leaves to lose their color and vitality.
Wilting Despite Watering: You might also notice that your plant wilts even though the soil is moist or wet. This is because the damaged roots cannot effectively take up water, even when it's available.
Soft, Mushy Stems or Roots: If you remove the plant from its container and notice the roots are black, brown, or mushy to the touch, root rot is likely the cause. Healthy roots are firm and white, so any dark discoloration or mushiness is a red flag.
Foul Smell: A strong, unpleasant odor coming from the soil is another common sign of root rot. The decaying roots release bacteria and fungi that produce this foul smell, which can be a telltale indicator.
Tip: Always check the roots when you repot a plant. If they feel soft or discolored, it's likely that root rot is present. Act fast to save the plant!
Causes of Root Rot
Understanding the causes of root rot can help you prevent it from happening in the future. The main culprit is usually overwatering or poor drainage, but there are other factors to consider as well.
Excessive Watering: Overwatering is the most common cause of root rot. When the soil is constantly soggy, the roots drown and can't get the oxygen they need. To avoid this, let the top few inches of soil dry out between waterings.
Poor Drainage: If your plant's container doesn't have drainage holes or if the soil is compacted, water can't escape, and the roots sit in stagnant water. This increases the likelihood of root rot.
High Humidity: While some plants thrive in humid environments, too much humidity can also encourage fungal growth, which can contribute to root rot. Ensure your plants have good airflow and aren't sitting in a damp, closed space for too long.
Tip: Always use well-draining soil for your plants and make sure pots have drainage holes to allow excess water to escape. This will reduce the risk of root rot significantly.
How to Treat Root Rot
If you catch root rot early, there's a good chance you can save your plant. Here's how to treat it step-by-step:
Step 1: Remove the Plant from Its Container
Gently remove the plant from its container and inspect the roots. Use clean scissors or pruning shears to cut away any dark, mushy, or decayed roots. Be sure to remove all affected roots to stop the spread of the rot.
Step 2: Disinfect the Roots
Once you've removed the decayed roots, rinse the remaining healthy roots with clean water. To further prevent any potential fungal infections, soak the healthy roots in a mixture of water and a fungicide or hydrogen peroxide (about 3%) for 10-15 minutes.
Step 3: Repot the Plant
Prepare a fresh container with well-draining soil and make sure the container has drainage holes. Gently repot the plant and avoid compacting the soil too much. This will help the roots re-establish and breathe better.
Step 4: Adjust Watering Habits
After repotting, be careful not to overwater. Only water when the top of the soil feels dry to the touch. For most plants, watering once a week is sufficient, but always check the needs of your specific plant.
Tip: If your plant has suffered significant root rot, it might not bounce back immediately. Be patient and give it time to recover. In some cases, trimming back damaged stems or leaves can also help the plant focus its energy on rebuilding healthy roots.
Preventing Root Rot in the Future
Prevention is always better than cure. By following these steps, you can minimize the chances of root rot in your plants and keep them healthy for the long term.
Water Properly: Avoid overwatering your plants. A good rule of thumb is to let the top inch or two of soil dry out between waterings. Make sure you understand the specific watering needs of each plant, as some plants prefer dry soil, while others need consistently moist conditions.
Use Well-Draining Soil: Always use a soil mix that drains well. Cactus and succulent soil, for example, contains sand and grit to help water flow through quickly. For other plants, ensure the soil is light and airy, not too dense.
Ensure Good Drainage: Choose pots with drainage holes to allow excess water to escape. If you're using decorative pots without drainage holes, consider placing the plant in a nursery container that fits inside for better drainage.
Tip: If you live in a particularly humid area, consider placing a small fan near your plants to increase air circulation, which helps prevent fungal issues and root rot.
When to Seek Professional Help
In some cases, root rot can be severe enough that home treatment isn't enough. If your plant is struggling despite your efforts, it may be time to consult a plant specialist or take it to a local garden center for advice.
Tip: If root rot continues to spread despite proper care, or if the plant's condition worsens, it may be best to remove the plant from your garden to prevent it from infecting others.
Root rot doesn't have to mean the end for your plants. By identifying the problem early, treating the roots properly, and adjusting your care habits, you can save most plants from this destructive condition. So, next time you notice yellowing leaves or wilting plants, take a closer look at the roots. Your plants will thank you for it!